You can set a priority number when sending a message from a Business Process — first we will try to send a message to it, and if there is no WhatsApp on it, we will check other numbers of the contact.
Let’s see this on the example of a contact with 3 phone numbers. By default, when adding Bitrix24 assigns the type — “Work” to all numbers. Let’s change one number’s type to “Mobile”. In our case, this number will not have WhatsApp.

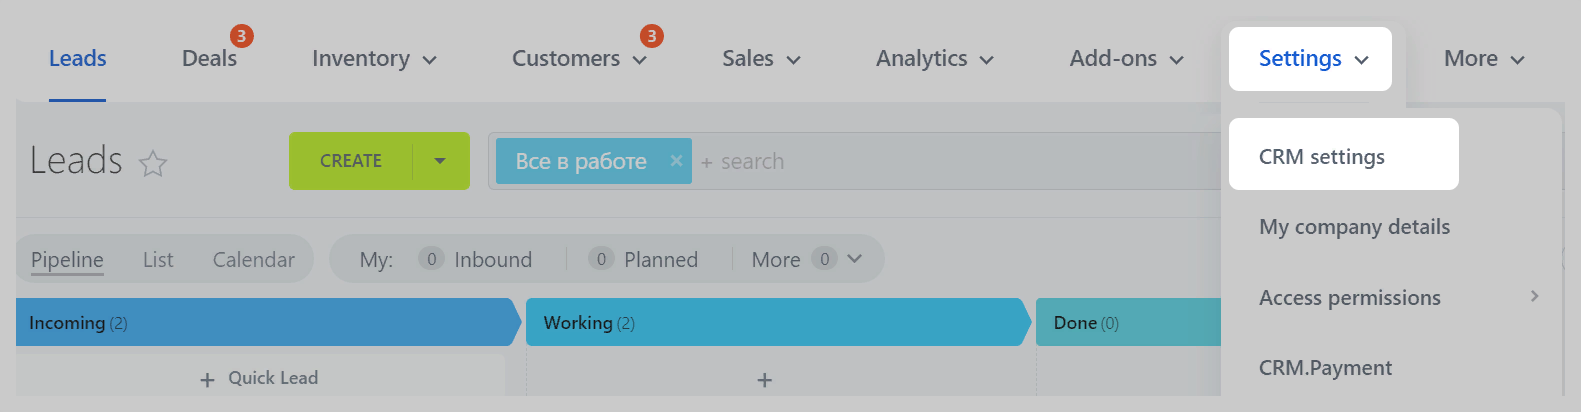
1. Go to “Settings” → “Automation” → “CRM Settings”.
2. Click “Automation” → “Business Processes” on the left.
3. Select the entity with which the business process will work: lead, contact, deal, company, etc.
In our example, this is “Deal” → “➕ Add Template”.
4. Check the “When added” checkbox under “Autorun” → go to the “Variables” tab and click “Add Variable”.

5. Fill in the two lines in the expanded window: “Name” and “ID”. You can enter any values in Latin. Leave the variable type as String:
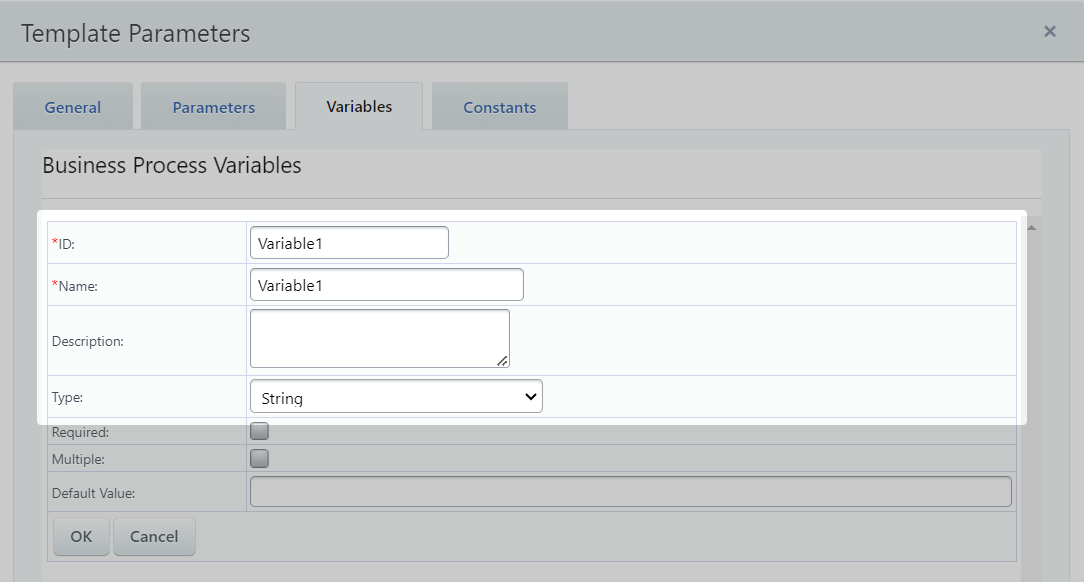
Click “OK” and then “Save”.
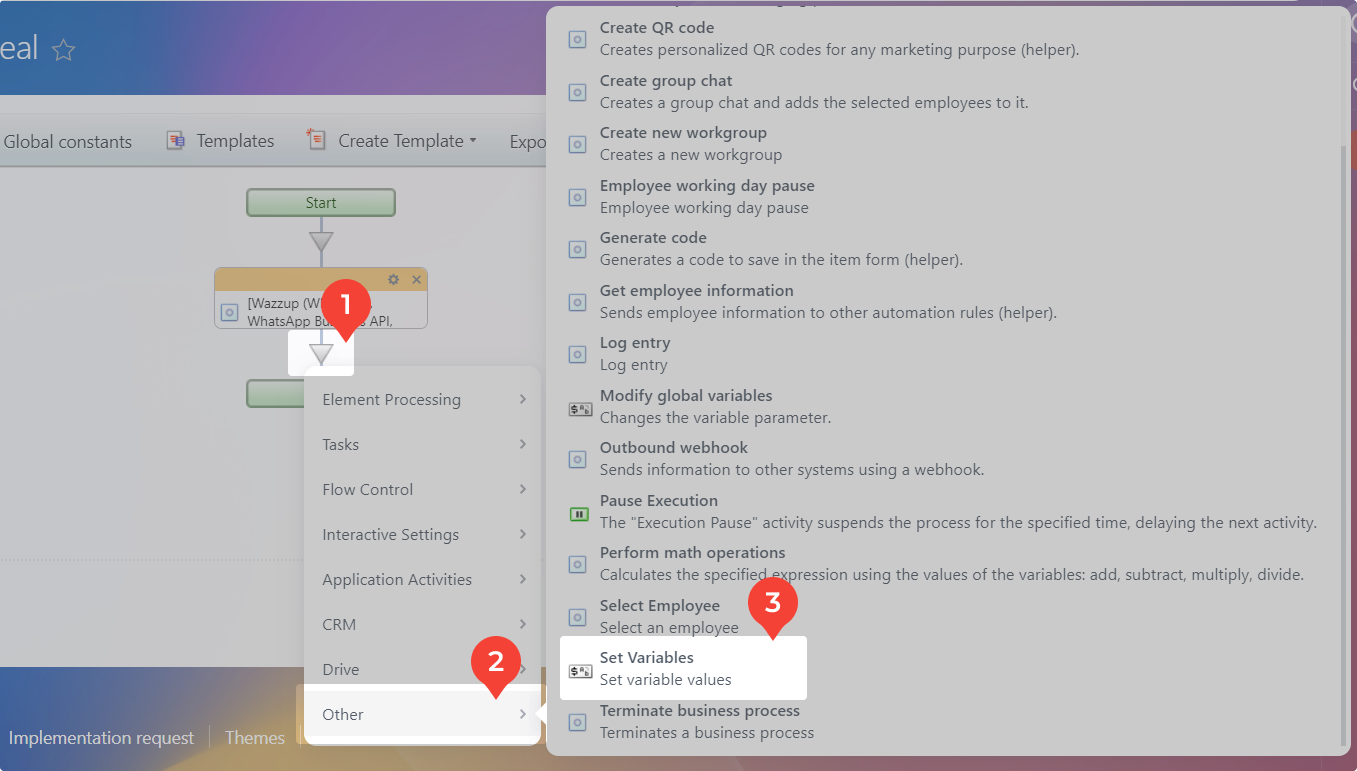
6. Click on the triangle between “Start” and “End” → “Application Actions” → “[WAZZUP] Automatic sending of template messages”:

7. Press the gear on the created action. The “Activity Parameters” window will open:

8. Customize the activity as instructed and add a message that will go to the user.
You need to send the message to the “Mobile” from the contact card first. Therefore, in the “Where to write” field select “Contact: Mobile (text)”.
After that, enter the message you want to send to the client and click “Save”.

When you perform this action, Wazzup will ask Bitrix24 for the “Mobile” from the contact and verify it. If there is an associated WhatsApp account with the number, a message will be sent to it.
If Wazzup detects that there is no WhatsApp account on the number, it will send an error to Bitrix24. We need to configure the Business Process so that when it receives the error, Wazzup will look for WhatsApp on the rest of the contact’s numbers.
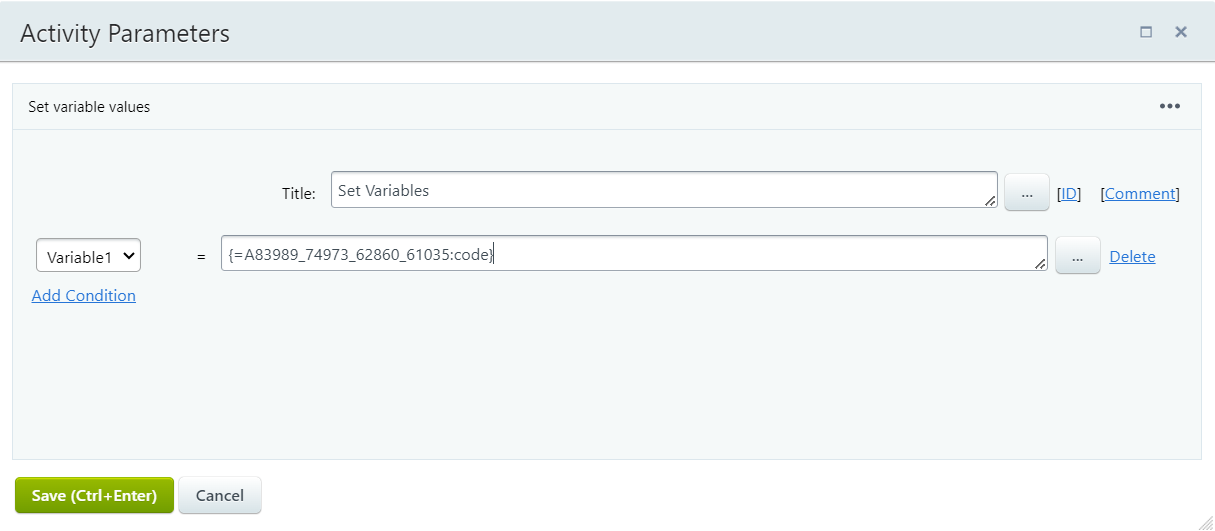
9. Click on the triangle between the Wazzup activity and the “End” → “Other” → “Set variables” button:
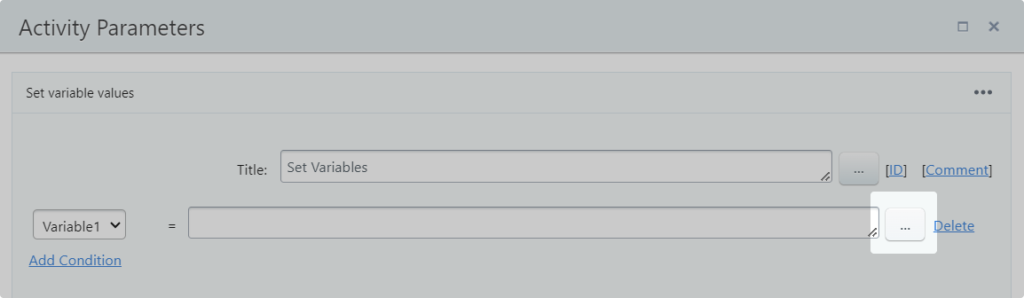
10. Click on the gear on the “Set Variables” action:
11. Make sure that the same variable you created is selected in the drop-down menu. Next to this line, click the three dot button:
12. Click the “Additional Results” link in the window that opens → “[WAZZUP] Automatic sending of template messages” → double-click “…Response code”:
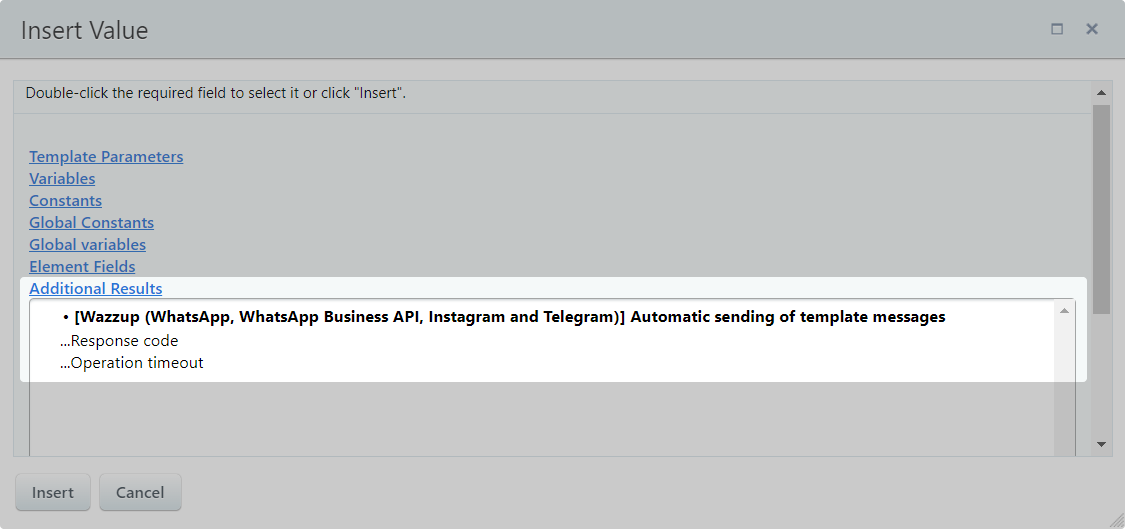
13. The code in the line with the variable will appear:
Click “Save”.
14. Click the triangle below the “Set Variables” → “Flow Control” → “Condition” activity:
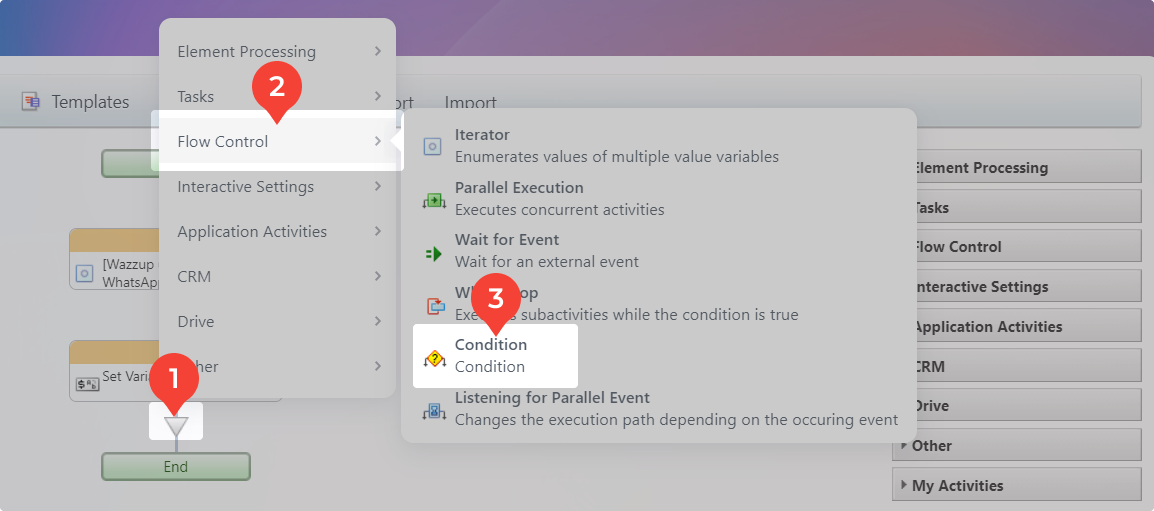
15. Click on any of the branches on the gear on “Condition”:

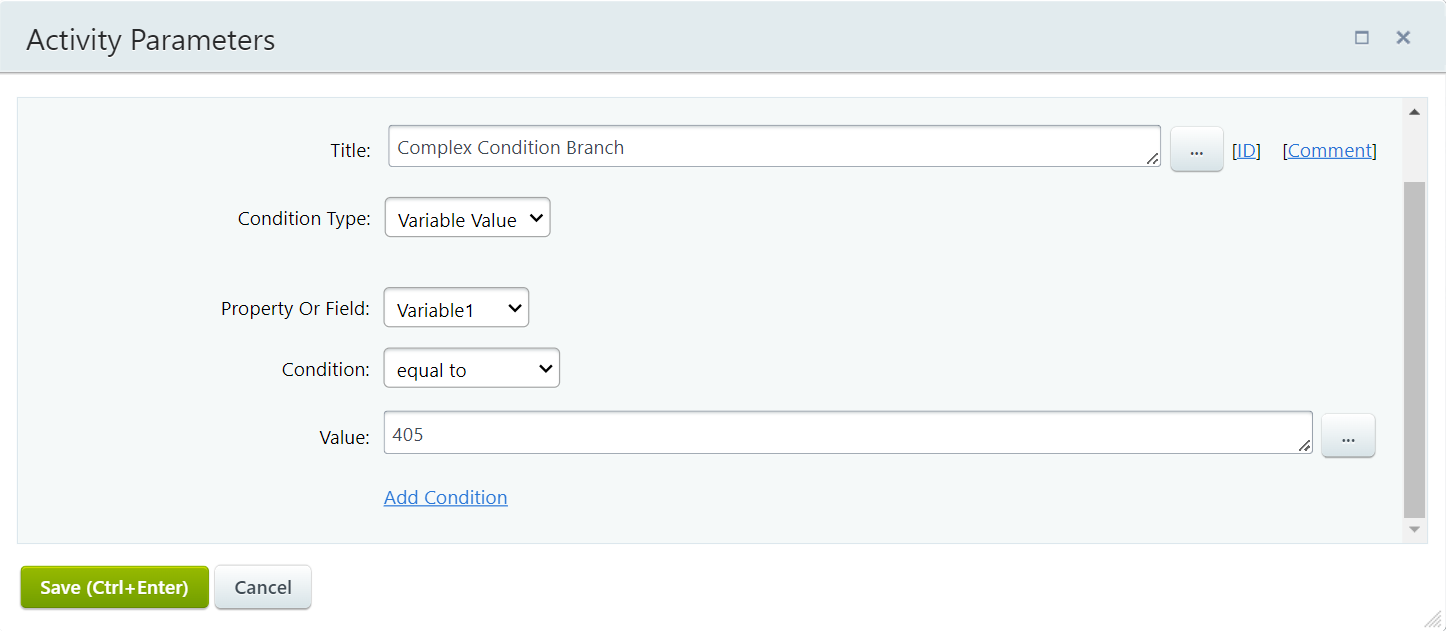
16. Select “Condition Type” — “Variable Value”, from the drop-down list “Property or Field” — your variable, “Condition” — “equals”, in the “Value” line type “405”. Save.
17. Tap on the triangle below the condition you have configured → “Application Actions” → “[WAZZUP] Automatic sending of template messages”.
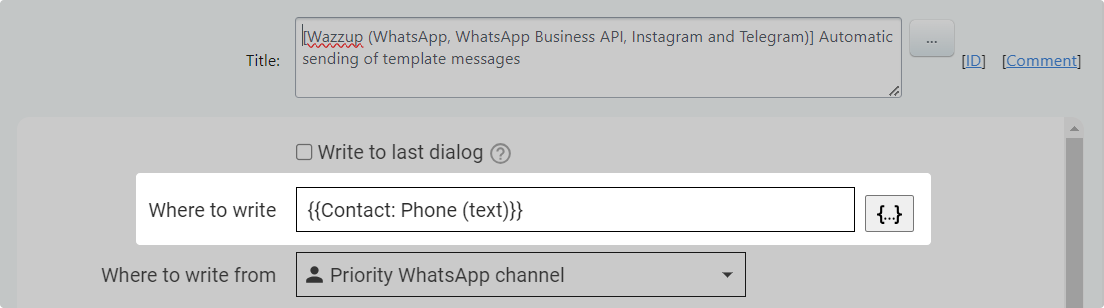
Bitrix24 needs to take all numbers from the contact card and pass them to Wazzup. Next to the “Where to write” line, click the button with three dots and select “Contact: Phone (text)”. Enter the message you want to send to the customer and click “Save”.
The business process is ready. Save it.
If Bitrix24 passes the “Mobile” number to Wazzup and Wazzup does not find WhatsApp on the number — the app return an error with code 405 to Bitrix24. Bitrix24 will receive the error and pass all the contact numbers. Wazzup will check them and send a message to the number with WhatsApp.